Data Flow Diagram
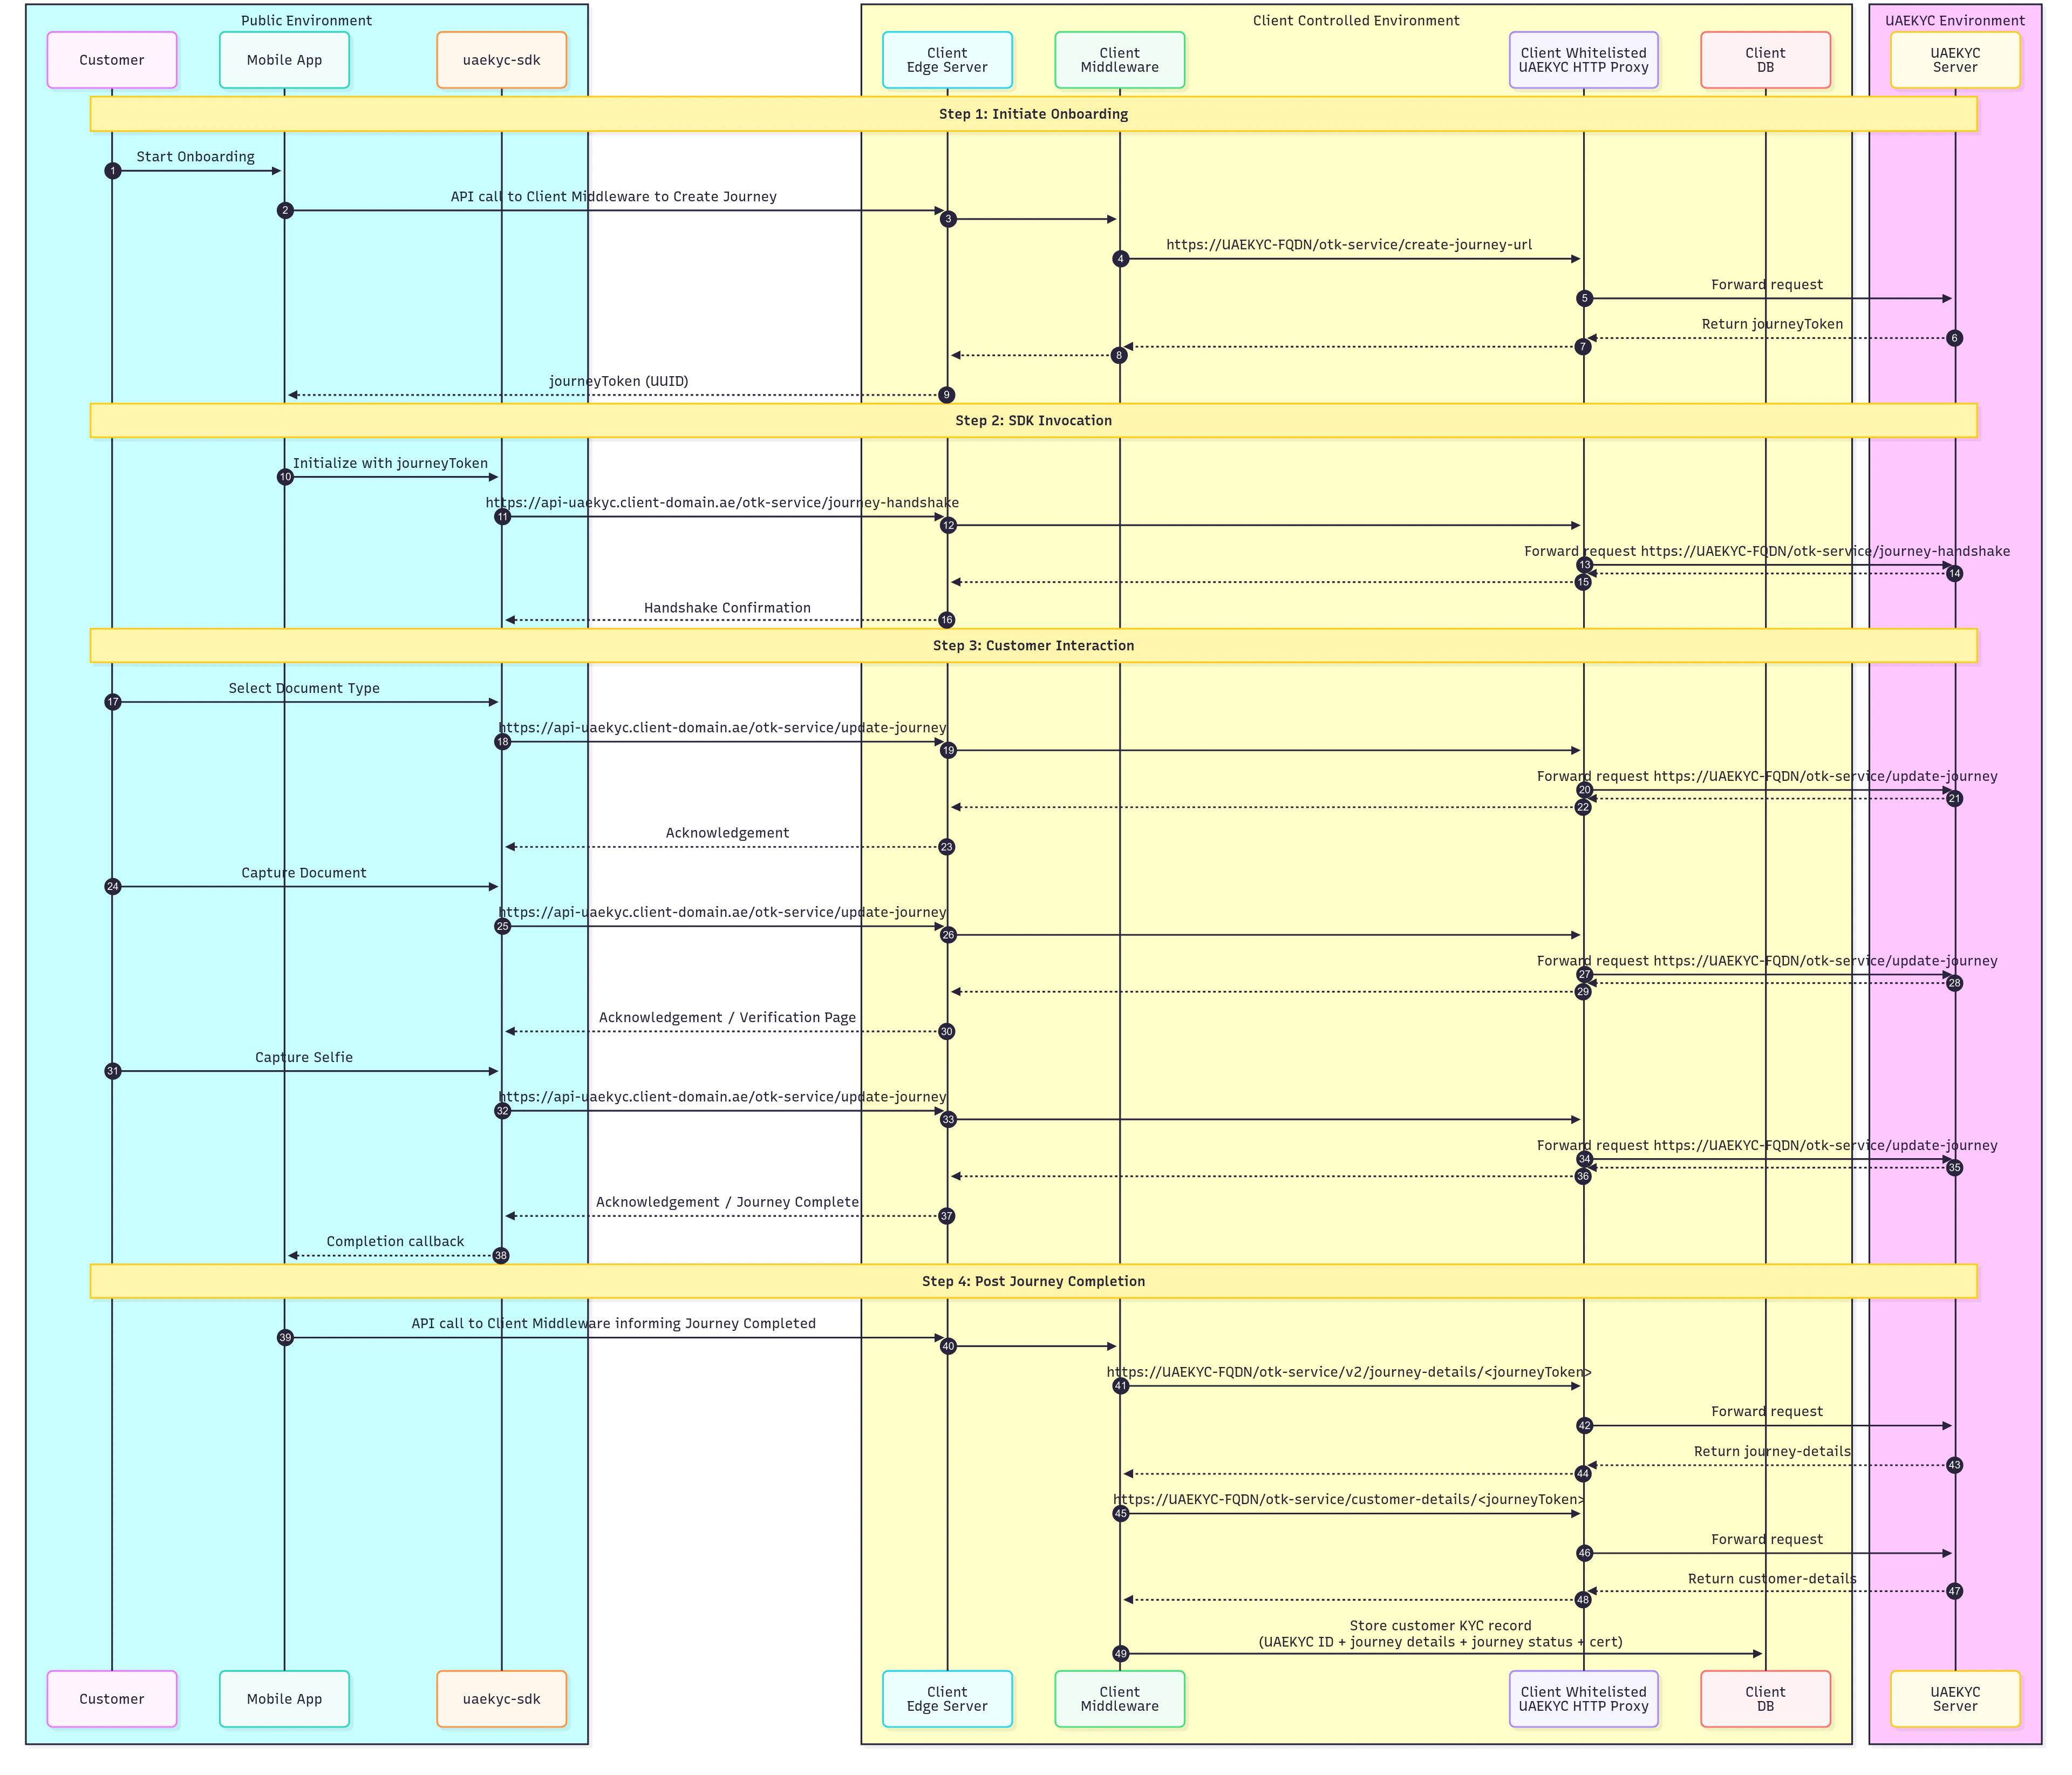
- Public Environment — the customer, mobile app, and UAE KYC SDK
- Client Controlled Environment — your edge server, middleware, whitelisted proxy, and database
- UAE KYC Environment — the UAE KYC server
Step 1: Initiate Onboarding
The customer starts the onboarding process from the Mobile App. The app makes an API call to your Client Middleware, which sends a Create Journey request to the UAE KYC Server through the Client Whitelisted Proxy:Step 2: SDK Invocation
The Mobile App initializes the UAE KYC SDK with the received Journey Token. The SDK performs a handshake with the UAE KYC Server by calling the/uik-service/journey/handshake endpoint, routed through your Client Edge Server and Whitelisted Proxy:
stg-icp-dash.<bank>.ae, which is only accessible from office/VPN networks and forwards traffic over the approved secure channel to the UAE KYC FQDNs.
Step 3: Customer Interaction
The customer proceeds through the verification steps guided by the SDK. Each interaction follows the same routing path through the edge server and proxy to the UAE KYC Server via the/uik-service/update-journey endpoint:
- Select Document Type — the customer chooses their identity document, and the server acknowledges
- Capture Document — the customer scans their document, and the server responds with a verification page
- Capture Selfie — the customer takes a selfie for biometric matching, and the server responds with a journey completion acknowledgement
Step 4: Post Journey Completion
The Mobile App notifies the Client Middleware that the journey is complete. The middleware then retrieves the verification results from the UAE KYC Server through the proxy:- Journey Details — calls the Journey Details API (
/v2/journey-details/{journeyToken}) to get journey logs and status - Customer Details — calls the Customer Details API (
/customer-details/{journeyToken}) to get the verified user information